
The ability to preserve your own food without refrigeration is an important preparedness skill, it’s also something that’s fun to do and can help cut down on your grocery bills.
Sun Drying Foods
Sun drying is one of mankind’s oldest and most reliable ways to preserve food. Archeological sites in ancient Egypt and Mesopotamia show this method of food preservation has been used since 4,000 B.C.
Sun drying is actually pretty simple; it relies on the sun and airflow – that’s pretty much it. While newer methods like electronic dehydrators speed up the process, sun drying is a slow gentle process that can really bring out the flavor of your food. It’s also a reliable method of preserving food during an emergency.
What can you Sun Dry?
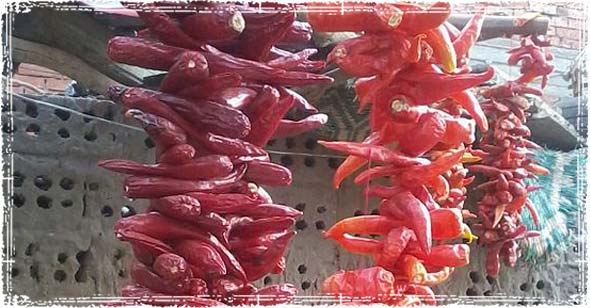
You can actually sun dry just about any type of food; that being said, fruits are the safest thing to start with and are preferable because of their high sugar and acid content – something that helps prevent spoilage during the drying process. During an emergency you could use this method to dry meats and vegetables, but during normal conditions I would advise using indoor methods unless you really know what you’re doing.
Things to keep in mind:
- Hot, dry, breezy days are best. A humidity level below 60 percent is best.
- A minimum temperature of 85ºF is required, but the higher the temperature goes the easier it will be to dry the food.
- It takes several days to dry foods out-of-doors, so before undertaking this method make sure you keep an eye on weather reports.
- At night, fruits must be covered or brought inside to prevent moisture from seeping back into the food.
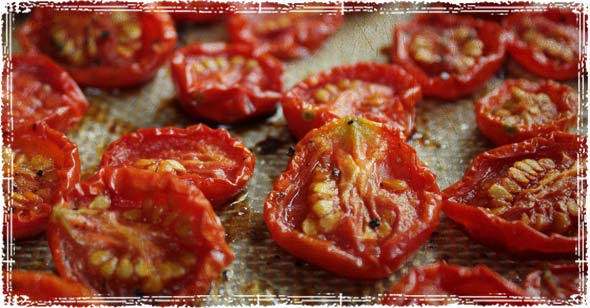
How to Preserve Fruit by Sun Drying
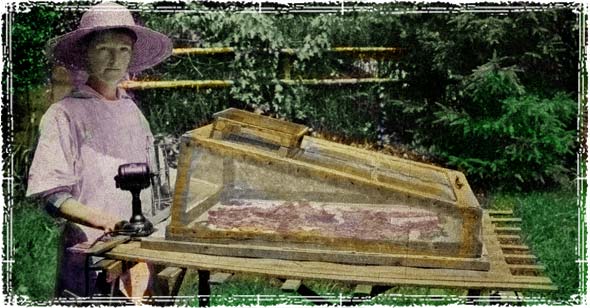
The first things you’re going to need are some good drying racks.
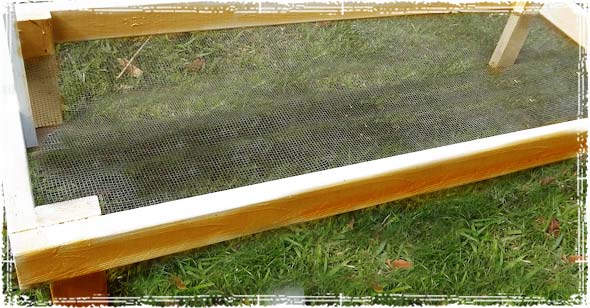
Small wood slats, bamboo, grill grates, and stainless steel screen mesh are all good material to use for the racks. You can also use cake racks or build small wooden frames covered with cheesecloth. Just remember that your racks cannot be solid, as you need air to circulate around the drying food.
Avoid any grates coated with cadmium or zinc. These metals can oxidize, leaving dangerous residues on the food.
Pretreating Fruit: Most fruits need some type of preparation before the drying process can begin.
- Fruits with pits should be halved and pitted
- Light-colored fruit like apples, pears and apricots should be soaked in lemon juice or an ascorbic acid wash to prevent browning. Soak the fruit in the solution for 3-5 minutes
- Cutting your fruit into uniform pieces will help them dry more evenly, and at the same speed.
It’s time to start drying some food.
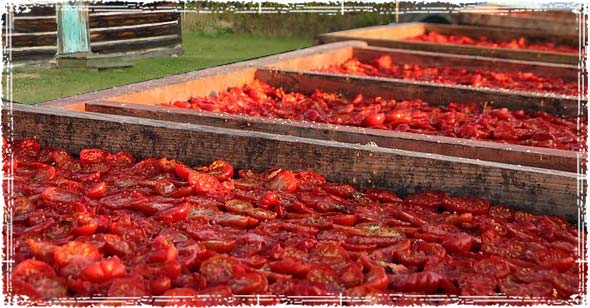
Place the pretreated fruit in a single layer on the drying racks. Then place your racks in an area that receives direct sunlight, and a good breeze. Try to pick an area away from animals, traffic exhaust, insects and dust. Once the food is placed on the racks in direct sunlight, place cheesecloth or netting around the racks to keep off dust and keep out insects.
- At night, make sure you bring your food indoors or cover it to prevent moisture from seeping back into the food.
- Turn food once a day, or flip the racks if you have dual layer racks.
- If possible, place a small fan near the drying tray to promote air circulation.
Fruits and vegetables take anywhere from 3 to 7 days to dry in the sun, depending on your local conditions. When the food is just about two-thirds dry, move it into a semi-shady but airy area to prevent the food from getting scorched by the sun.
Pasteurization & Conditioning
Before storing Sun dried foods, you should condition and pasteurize the food.
Conditioning Dried Fruits
To improve storage times and to ensure the safety of your food dried fruits should be conditioned before storage. Conditioning evenly distributes moisture present in the dried fruit to prevent mold growth.
- Cool the foods on the trays.
- Place cooled dried fruit in a plastic or glass container two-thirds full; seal and store for 7 days to 10 days.
- Shake the containers daily to distribute moisture. If condensation occurs, place the fruit in the oven for more drying and then repeat the conditioning process.
- Check for any signs of spoilage.
Pasteurizing Sun-Dried Fruits
Pasteurization is especially important because it will destroy any insects and their eggs. It can be done using either a freezer, or an oven.
- To pasteurize using an oven, place the food in a single layer on a tray and then place in an oven preheated to 160°F for 30 minutes.
- To pasteurize using a freezer, simply seal the dried food in freezer plastic bags and place them in a freezer set at 0°F for 48 hours.


***To pasteurize using an oven, place the food in a single layer on a tray and then place in an oven preheated to 160°F for 30 minutes***
In the real world, when electricity is no longer available, use a brake bleeder from Harbor Freight.
These work great for me when for some reason, the vacuum sealing method fails.
Are you sure with the 30 mins in he oven? Seems a little long.
If i don’t have a rack and less manpower and high investment costs, can any other method work quickly in a remote area?
Maybe consider a solar oven to dry and to pasteurize product for long term storage. It would be off the grid sustainable and adjustable for low heat and ventilation to dry. I am trying out dollar store reflective car windshield shades for a solar oven. Now $2 for the stiffer cardboard ones. If it works, it’ll be a lot cheaper than several hundred bucks for a manufactured solar oven. Also, mylar blankets glued to cardboard boxes is another solar oven in project the works. Hopefully the dollar stores will be carrying the turkey size oven bags that can be used with the solar ovens. Someday I’ll make a soda can solar heater to use for drying food in the summer and as a passive solar heat source in the winter. We have sash windows facing south. Hope it works.
And, yes, the Harbor Freight brake bleeder works great as a back up if the Food Saver fails. At least I’ll be able to vac seal canning jars.
Love sun-dried food and enjoy doing them too. Just don’t have the luxury of open space with lots of sunlight..
Love sun-dried food and enjoy doing them too. Just don’t have the luxury of open space with lots of sunlight..