
I do a vast majority of my outdoor activities in a harsh desert environment, so I think I understand the importance of planning for water emergencies better than most. Anytime I take a trip out into the desert, water is always one of my top priorities. Even on a short routine day hike, not having enough water can quickly turn into a life-threatening emergency. Unfortunately, I can’t tell you how many times I’ve seen even seasoned hikers fail to take adequate precautions to protect themselves from dehydration.
You never want to put yourself anywhere near a state of dehydration, especially when doing any strenuous activities where obtaining water may be a challenge. If you wait until you’re thirsty to start drinking water, you’ve already put yourself into the danger zone – your body is already dehydrated. That’s why paying attention to your water intake, and pre-planning is so critical to your safety.
When you’re hiking in the heat, your body can lose close to a quart of fluid an hour through sweat alone, more if you’re climbing or hiking in direct sun. That number climbs fast on a long summer day, which is part of why so many otherwise experienced hikers still get caught off guard. It’s not usually because they didn’t know water mattered — it’s because they underestimated how much they’d actually lose and how quickly.
It’s far easier to prevent dehydration than it is to treat it. Progressive signs and symptoms of dehydration include:
- Thirst
- Decreased urine output and or dark urine
- Dry mouth and chapped lips
- Reduced sweating
- Muscle cramps and pain
- Nausea and vomiting
- Heart Palpitations (increased heart rate)
- Dizziness
- Weakness
- Confusion
It’s worth understanding how these symptoms actually progress, because the early stages are easy to write off as just being tired or hot. Mild dehydration, generally a loss of around 2 to 4 percent of your body weight in fluid, typically shows up first as thirst, a dry mouth, mild fatigue, and a headache that creeps in without an obvious cause. This stage is easy to fix — drink water, rest in the shade, and you’ll usually feel better within 30 minutes or so.
Moderate dehydration is a different situation. At this stage you’re looking at real lethargy, nausea, muscle cramping, dizziness when you stand up, and a noticeably faster heart rate. This is the point where plain water alone may not be enough — your body’s losing electrolytes along with the water, and replacing only one without the other can leave you still feeling off even after you’ve been drinking. A small amount of salty food or an electrolyte mix alongside your water makes a real difference here.
Severe dehydration is a medical emergency, not something to push through on the trail. Confusion, extreme weakness, a rapid or weak pulse, and an inability to keep fluids down are all signs that you or someone in your group needs help getting out and likely needs medical attention, not just more water. If you or anyone you’re hiking with reaches this stage, treat it the same way you’d treat any other serious medical emergency — stop, signal for help if you can, and don’t try to power through the rest of the hike.
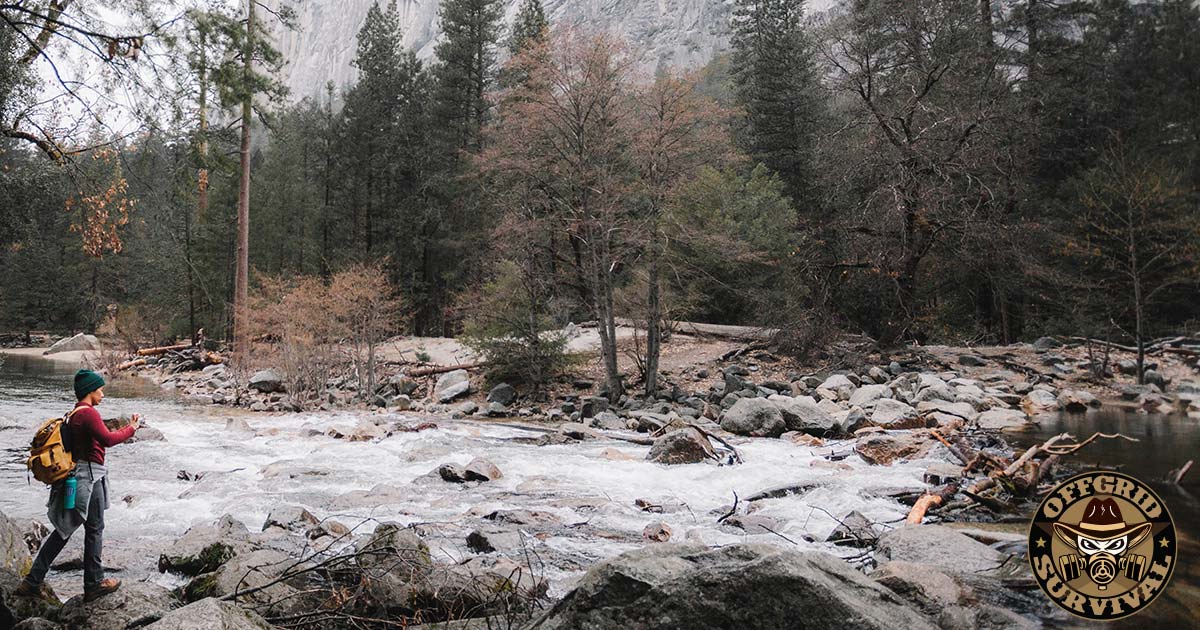
No matter what area of the world you live in, if you’re venturing out into the wilderness you need to carry enough water to sustain yourself during an emergency, and you need to have a plan for refilling your supplies if things go bad.
Know where to find water during an emergency.
Before ever setting foot on the trail you need to research the area. Take some time to find out where the local water holes are, and make sure you plot them on your maps or GPS devices.
- Ask others who hike or hunt in the area about local watering holes.
- Jump on Google Earth to find nearby lakes, ponds or rivers.
- Study topographic maps of the area for small streams, or areas that may hold water.
- Contact whatever agency manages the area you plan to visit; they can provide you with knowledge beyond what you’ll find on maps. Just because a watering hole appears on the map, doesn’t mean it’s available year round.
A few additional things worth checking before you ever leave the trailhead:
Seasonal flow matters as much as location. A spring that’s reliable in April can be bone dry by August, especially anywhere prone to seasonal drought. If you’re relying on satellite imagery or an older map, cross-reference it with something current — recent trip reports from other hikers, a ranger station phone call, or a land management agency’s website are all far more current than whatever year the map was printed.
Check recent fire history for the area. Burned terrain changes runoff patterns dramatically, and a creek that used to run reliably can behave very differently after a major wildfire has stripped the watershed above it of vegetation. This is exactly the kind of detail a local ranger station will know and a map won’t show.
Build in a margin, not just a plan. Even with solid research, treat your water source list as a backup to carrying enough water to comfortably finish your hike without relying on any of them. Pre-trip planning gets you a list of options; it shouldn’t be the reason you pack less water than you’d otherwise carry.
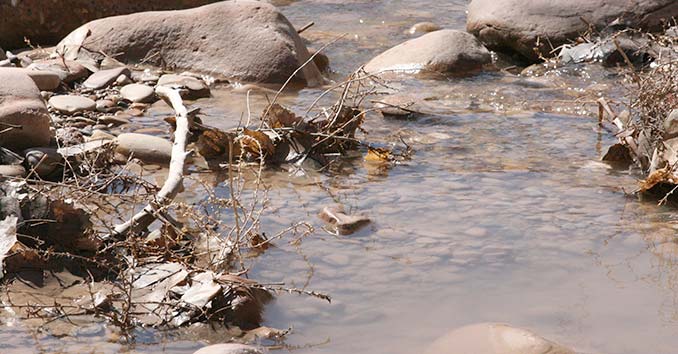
Finding Water in the Wilderness: What to look for.
Hopefully, you already did some pre-planning, and have a pretty good idea where the local watering holes are. But if you find yourself in a situation where water is scarce, there are some things you should be on the lookout for to increase your chances of finding water.
Watch for:
- Valleys and low areas: These are the types of places where water naturally drains.
- Rock crevices: Watch for cracks or large holes and indentations, especially after a recent rainfall. These will be the areas where water naturally collects.
- Muddy or damp ground: A seep can be made almost anywhere the ground is wet, damp or muddy on a regular basis. Digging into the damp, muddy ground will create small pools of water. While this water will be somewhat filtered, it’s still advisable to treat the water before drinking.
- Large patches of vegetation: In harsh desert environments you want to watch for any signs of fresh green vegetation. This is going to be your best chance of finding water.
- Animal Tracks: Animal tracks and trails are probably a good indication that water may be close at hand. Following these trails, or watching out for signs of wildlife can often lead you right to water.
A few more signs worth knowing, beyond the basics:
Insect activity is a reliable indicator. Bees in particular rarely range far from a water source — if you’re seeing consistent bee activity, especially bees flying in a fairly direct line rather than just foraging randomly, it’s worth following that line. Flies and gnats clustering in one area can also point to nearby moisture, even if it’s not an obvious surface water source.
Bird behavior changes near morning and evening. Many bird species, seed-eating birds especially, head to water sources at dawn and dusk and tend to fly fairly directly between roosting and watering areas. If you notice birds consistently flying the same direction at these times, particularly grain or seed eaters rather than birds of prey, it’s a reasonable signal worth investigating.
Rock and canyon country hides water in specific spots. In sandstone or limestone canyon terrain, look at the base of cliff faces and in shaded alcoves, where water seeping through rock often collects in small pools called tinajas or potholes. These can hold water long after the surrounding desert has dried out, especially in spots that get limited direct sun.
Morning dew can be collected in genuinely dry environments. Tying absorbent cloth around your ankles and walking through dewy vegetation at dawn, then wringing it out, isn’t going to sustain you long-term, but it’s a real technique that can supplement what you’re carrying in a pinch.
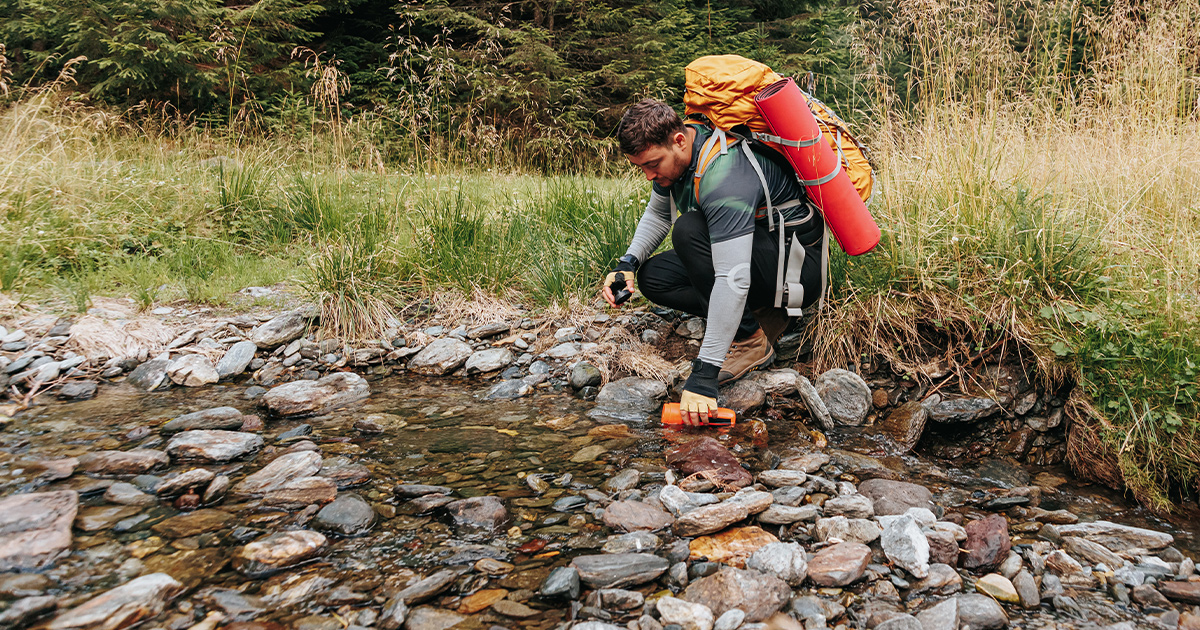
Have a way to filter or treat backcountry water.
The tricky thing about water is looking at it tells you nothing about how safe it may or may not be to drink. Even water that “looks clean” may be contaminated with some pretty nasty microorganisms.
- Carrying a Water Filter – Water filters are great because they’re quick, easy to use, and are ideal for those who are on the go. I recommend something like the Katadyn Pocket Microfilter; it’s one of the top filters on the market and my top choice when going anywhere.
- Carry a Steel Canteen or Water Bottle – Another thing that I always carry is a way to boil water. I’ve switched from plastic water bottles to stainless steel specifically for this purpose. One of the best I’ve found is the Klean Kanteen. I’ve been using them for years, and they can really take a beating.
- Chemical Treatments – Iodine tablets and liquid bleach are popular with light hikers, and can be a great option during a short-term emergency. Because you’re limited by the amount you carry, I still advise having a backup to this method in case you find yourself in a long-term survival situation.
It’s worth understanding what each of these methods actually protects against, because they’re not interchangeable. Mechanical filters with a small enough pore size remove bacteria and protozoa like Giardia and Cryptosporidium effectively, but many filters don’t remove viruses, which are a bigger concern in water sources downstream of dense human activity than they are in most backcountry settings. Boiling is the most universally effective method — a rolling boil for about a minute (longer at high altitude) kills essentially everything biological in the water, no exceptions and no pore-size limitations to worry about. Chemical treatments like iodine and chlorine dioxide are effective against most bacteria and viruses but are notably weaker against Cryptosporidium, which is part of why pairing a chemical treatment with a filter, rather than relying on either alone, is a smart approach if you’re carrying both.
Whatever method you choose, always filter out visible sediment first, either by letting water settle or pre-filtering through a bandana or cloth. Cloudy, silty water clogs filters fast and can shield organisms from chemical treatment, so a simple pre-filter step meaningfully improves how well your actual treatment method performs.
How much water should you actually carry?
A rough rule of thumb for moderate activity in mild temperatures is about half a liter per hour of hiking, but that number climbs fast with heat, exertion, and elevation. On a hot day, especially anywhere with direct desert sun, a full liter an hour isn’t unreasonable, and climbing or carrying a heavy pack pushes that higher still. For planning purposes, it’s safer to estimate on the high side and treat any water sources along your route as backup rather than your primary plan.
A useful way to think about it: calculate your minimum based on the hottest, driest, most strenuous version of conditions you might realistically hit, not the average. A cool, easy morning hike and an unexpectedly hot afternoon on the same trail can have wildly different water demands, and weather doesn’t always cooperate with the forecast you checked the night before.
If you’re hiking with a group, plan individually rather than assuming everyone needs the same amount. Body size, fitness level, heat acclimation, and how much someone sweats all vary significantly between people, and the slowest, most heat-sensitive person in your group is the one whose water needs should set the baseline for how much backup capacity the group carries collectively.
Don’t ever underestimate the importance of carrying enough water.
The average person can survive without food for weeks, maybe even months. In contrast, if you go without water for even a day, especially in hot, dry environments, your body begins to feel the effects of dehydration.
Water should always be a top priority when planning any outdoor activity, and during a survival situation finding water becomes your number one priority. Plan your route, know your sources, carry more than you think you’ll need, and have a reliable way to treat anything you collect along the way — that combination is what actually keeps a long, hot day on the trail from turning into the kind of emergency this article is named for.


Just found a great deal on a Lifesaver Jerrycan water purifier on Costco. Hopefully you can get on e while they are in stock